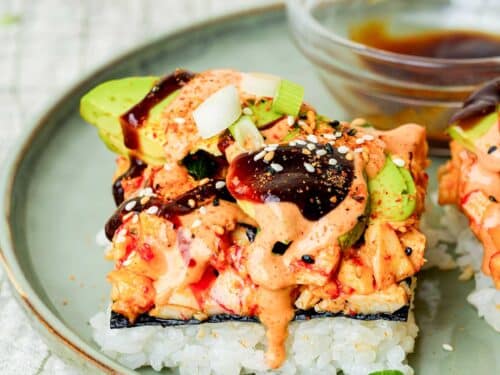
Why Make This Salmon Sushi Bake Without Cream Cheese?
Sushi bakes are the perfect combination of comfort food and sushi vibes, but not everyone is a fan of cream cheese. Fortunately, this salmon sushi bake without cream cheese skips the heaviness while keeping all the deliciousness. It’s light, flavorful, and incredibly easy to make, which means you’ll spend less time cooking and more time enjoying.
What’s more, this version lets the fresh flavors of salmon, rice, and umami-packed toppings shine. If you’re already into sushi bakes, you’ll love exploring other options like the Ultimate Guide to Sushi Bake Recipe Crab. Pair this bake with a sweet dessert like Earl Grey Cookies to make the experience even more delightful!
What Makes This Recipe Unique?
First, this recipe focuses on lightness, so you won’t feel weighed down after indulging. Additionally, skipping cream cheese means the dish keeps a more authentic sushi profile, highlighting the fresh salmon, seasoned rice, and toppings like furikake. Moreover, it’s an excellent option for those looking to avoid dairy or just try something new.
For a meal that truly wows, consider pairing this bake with a sweet and savory treat like the Pumpkin Banana Loaf. Together, they create a balanced dinner party menu that’s hard to beat.
Ingredients You’ll Need
For the Rice Base
- 1.5 cups short-grain sushi rice (sticky is key!)
- 2 tablespoons rice vinegar
- 1 tablespoon sugar
- A pinch of salt
Regarding the Salmon Mixture
- 1–2 pounds of salmon (fresh or canned)
- 1 cup Kewpie mayo (or regular mayo for convenience)
- 1 tablespoon sriracha
- 1 tablespoon soy sauce
For the Toppings
- Furikake seasoning
- Green onions, chopped
- Optional: Spicy mayo (mayo + sriracha)
Step-by-Step Instructions
1: Prepare the Sushi Rice
- First, rinse the sushi rice thoroughly to remove excess starch. This ensures a clean, fluffy texture.
- Then, cook the rice according to the package instructions.
- While it’s warm, mix in rice vinegar, sugar, and salt. This simple seasoning gives the rice its signature sushi flavor. Finally, press the rice evenly into a greased baking dish to form the base.
2: Make the Salmon Mixture
- If you’re using fresh salmon, bake it at 375°F for 15–20 minutes, or until it’s fully cooked. Alternatively, canned salmon is ready to use after draining and shredding.
- Next, mix the salmon with Kewpie mayo, soy sauce, and sriracha. For more spice, add extra sriracha, or skip it altogether for a milder flavor.
3: Assemble the Bake
- Spread the salmon mixture over the rice layer. Then, sprinkle furikake seasoning generously on top for crunch and flavor.
- After assembling, your dish is ready to bake.
4: Bake and Broil
- Bake the dish at 375°F for 10–15 minutes.
- After baking, switch to broil for 2–3 minutes to achieve a crispy, golden crust. Keep an eye on it so the topping doesn’t burn.
Serving Suggestions
This salmon sushi bake without cream cheese is versatile and fun to serve. Here’s how to take it up a notch:
- DIY Handrolls: Serve with nori sheets so everyone can scoop and roll their own sushi-style bites. It’s interactive and great for gatherings.
- Sushi Nachos: Pair the bake with tortilla chips for a playful, crunchy appetizer.
- Fresh Additions: Add cucumber slices, avocado, or pickled ginger to brighten up the flavors.
FAQs
1. Can I use canned salmon?
Absolutely! Canned salmon is not only convenient but also works beautifully in this recipe.
2. Is this dish spicy?
It has a mild kick from the sriracha, but you can easily adjust the heat level to suit your taste.
3. How long does it last?
Stored in an airtight container, it stays fresh in the fridge for up to three days. Reheat in the oven or microwave for the best results.
Why This Recipe Is a Winner
This salmon sushi bake without cream cheese proves that you don’t need cream cheese to create a rich, satisfying dish. With its light texture, bold flavors, and endless customization options, it’s a recipe you’ll come back to time and time again. Pair it with a cozy dessert like Earl Grey Cookies or a fruity Pumpkin Banana Loaf for the ultimate dining experience. 🍣
